-
Search for running squid-deb-proxy (and more)
if there is a squid-deb-proxy running on your network it should show up with the following command among other services
avahi-browse --all -
Bash Read File
Here is the code snippet that I will use in the future when I want to read in a file line by line
#!/bin/bash
while read LINE ; do
    echo $LINE;
done < file.txt;
The following is a possibility too, but, any variable used on the inside of the while loop will not be available on the outside. This is because below the while loop is executed in a sub-shell because of the pipe.
#!/bin/bash cat file.txt | while read LINE ; do echo $LINE done -
Custom Home Folder Sub-Folders
In my case I don't like th folders in my home folder being capitalized. In order to change what your home folder sub-folders are you need to edit
~/.config/user-dirs.dirsand from there it is pretty self explanatory. You'll have to manually create the folders I believe. And then restart Nautilus withkillall nautilusit will start up back again automatically. All thanks to this posting goes to http://www.howtogeek.com/howto/17752/use-any-folder-for-your-ubuntu-desktop-even-a-dropbox-folder -
Copy Hidden Directories
I used this to duplicate the majority of my home folder
~$ cp `ls -a | egrep '^\.[^.]'` ../newHome -revery output line of ls -a is fed into egrep and filtered based on lines that start with . but do not start with .. because it is required that the line start with a . because of ^. the \ exists in order to treat the . literally and not as a wild card. Then [^.] says that the character following the first . at the beginning of the line cannot be a . . The, for each out that remains after the filter cp is ran using that output as the source and ../newHome as the destination. And finally, the -r does a recursive copy.
Caution: As I am finishing up this blog post I am wondering why my laptop is still griding away at the copy, it is because there was a ton in the trash folder which is located in .local.
Though this does work in theory for your home folder it didn't work so well, but, the idea still works for copying hidden files or even filtering the items that you wish to copy
-
Installing IIS PHP MYSQL Joomla!
A friend needed some information on doing this install so I made this video. I do not recomend installing PHP MYSQL and Joomla! on a Windows platform as they apparently run better on linux, it's far cheaper, easier, and there is more community support. But.... if you sigh must sigh install it on Windows.... here is how: I made a couple goofs in the videos, but, frankly, I was getting tired of making the video... and of course... tired of doing the devil's work (endorsing Windows)... lol.. kidding. Anyway, I hope this helps some poor soul out there who is forced into using Windows.
-
Redirect Within Body
If you do not have access to the head of a webpage it is useful to know how to do a redirect within the body. Here is an example:
<html> <head> <title> test </title> </head> <body> <script language="javascript"> location.replace('http://www.torypages.com'); </script> </body> </html> -
Mouse Faster than Maximum
I like having a really fast mouse speed. I wanted to set the speed faster than the maximum allowed speed in Ubuntu 10.04. This is how I did it.
$ xset m 5 1I'm sure you can configure this more to your liking, but this was good enough for me. Check the manual page if interested of course.
-
Samba, Symbolic Links, Windows XP
The other day I noticed that I was unable to follow a symbolic link in a Samba share definition. I fixed this by adding
unix extensions = noto the [global] section in /etc/samba/smb.conf as well as making my share definition (in the same file) to look like this[homes] comment = Home Directories browseable = yes writable = yes valid users = %S wide links = yes -
Bikelane Parking Lot
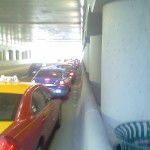
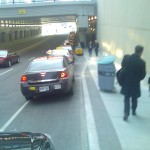
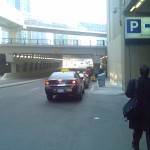
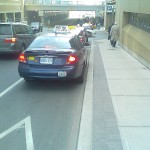
Unfortunately today was the first I have commuted by bike in a long time. None the less, I was was glad to be out again. Sadly, it served as a reminder of how bad cycling in Toronto can be. These problems of course being related to the on going struggle between cars, bikes and pedestrians. I am all three of these, I do sympathize with them all, I'm not blaming, and everyone shares fault. But, what I ran into today was obscene.
Much of my riding consists of commuting from Etobicoke to downtown. A great way to do this in a relatively safe manner is to take the Martin Goodman Trail. During my commute while utilizing the trail I generally feel safe, this was not the case when getting from the lake to the downtown core particularly while going under the rail lines.
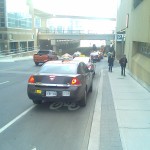
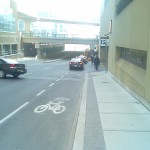
As such, last fall when a bike lane was put on Simcoe Street that allowed for safe passage from Front St. to Queens Quay I was ecstatic. Having not been out on my bike for a while I had not had an opportunity to utilize it till today. However, there is a big problem. Instead of building a bikelane the city built a Taxi stand instead.
Update: Over a year later, I still can't ride in this bikelane, but this time for a different reason. See Here
Related Link: http://bikingtoronto.com/duncan/lower-simcoe-taxi-stand-wait-thats-a-bike-lane/
Toronto Start article inspired by my photos: http://www.thestar.com/news/gta/article/778222--cars-clog-new-simcoe-st-bike-lane
-
Wikipedia and Defamation Removal
In 2009 ones online presence isn't a matter to be taken lightly. The importance of ones on-line identity have being popping up all over the place over recent years often in a negative view. People have lost jobs or even have been charged with academic misconduct often because of items in the on-line world that were perceived to be benign by the negatively effected people.
For this reason, the recent case of Wikipedia defamation I was recently involved with was a matter of significant importance and was likely a heart racing event for the victim. The unfortunate part is that it was quite difficult to figure out what to do.
The first and most important step is to immediately remove the offending material out of the main article. This can be done by editing the content of the article by clicking the appropriate edit link in the article and updating the section.

Or by "undoing" the offending entry by clicking the "undo" link of the offending "Revision History" entry located on the history page .

The "Revision History" section of the article which can be accessed via the top links of the article.

Once this is done the most important part is done. However, there will still be evidence of the defaming content in the history section. Unfortunately, but rightfully so, the "Revision Histories" cannot be easily removed. Even though the inability to easily remove history is an important aspect of Wikipedia it presents us with a problem in terms of riding the internet of the offensive material in question. Luckily there is a way. In order to remove/hide defaming material from the "Revision History" section one must make a "Request for Oversight". This can be done via email or IRC chat. All the information needed including the email address, IRC addresses and the rules regarding these requests can be found here http://en.wikipedia.org/wiki/Wikipedia:Requestsforoversight One should include the "diff" page URL that highlights the offending material. This "diff" page link can be found on the "Revisions History" page. The relevant "diff" page will have to be selected by clicking one of the "prev" links from a list of many.
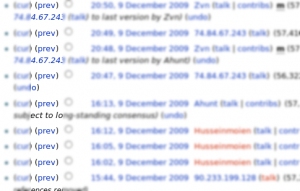
Doing so will give you a page such as this
-
Extract/Create .tar .tar.gz .tar.bz2
I have always been dumbfounded as to how to extract and create .tar .tar.gz and .tar.bz2 but I don't know why because there really isn't much to it.
First off what are these things? .tar is simply a bundle of files packaged into one. And .tar.gz and .tar.gz2 are compressed packages that can be considered the same for most peoples purposes. However, I believe .tar.gz2 can compress files further than .tar.gz but takes longer.
Checkout for more information check out http://en.wikipedia.org/wiki/Comparisonoffile_archivers
To extract and create you use the "tar" command combined with some options. The options are as follows and are combined together to create a single statement.
x = extract v = show what the computer is doing (verbose) f = you are providing a filename z = dealing with .tar.gz j = dealing with .tar.bz2 c = create Extraction of .tar.
As you type this command out. Type "tar" then "-" for options, "x" for extract, "v" to show me what is going on also known as 'verbose' and "f" because I am supplying a file name. Extraction of .tar.gztar xvf toBeExtracted.tar
same thing as before but with "z" added to it. Perhaps you could think "z" for zipped. With "v" for verbose left off this time. Extraction of .tar.bz2tar xzf toBeExtracted.tar.gz
Similar to above, but instead of "z" it is "j". It is always nice to have a story to remember something, and apparently .bz2 was invented by Julian Seward, so, "j" for Julian. Creation of .tartar xvjf toBeExtracted.tar.bz2
"c" for create Creation of .tar.gztar cfv resultingFile.tar folderOrFileToBeCompressed
Creation of .tar.bz2tar cfvz resultingFile.tar.gz folderOrFileToBeCompressed
Summary In sum, use the switches as listed above in combination (order is important) to achieve your goal. Once you study these commands a little bit you will feel far more comfortable with them. For more information check out the manual page with the following command.tar cfvj resultingFile.tar.bz2 folderOrFileToBeCompressedman tar
« Prev
Next »


